
以前、Objective-Cなradikoro用に導入した、Sparkle: open source software update framework for macOSですが、(今更ながら、アップデートの処理に Sparkleを導入(Ver.2用改訂版) | MacFeeling Blog)
SwiftUI化して、新たに生まれ変わったQTAirで利用してみることにしましたので、その備忘録を
環境:macOS Ventura 13.5.1、Xcode 14.1、Sparkle 2.4.2
プロジェクトはSwiftUIで作成したもの。SandBox化してあります。
まずは、公式ドキュメントに沿って導入開始。Documentation – Sparkle: open source software update framework for macOS
今回は、Swift Package Managerにて導入することに
Xcodeで Sparkleを導入するプロジェクトを開いたら、「File」メニューより、「Add Packages…」を選択
検索フィールドに
https://github.com/sparkle-project/Sparkle
と入力してリターンキー。
Sparkleが表示されたら、設定を確認して、問題なければ「Add Package」ボタンをクリック。

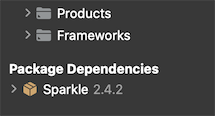
プロジェクトには、こんな感じで表示されます。
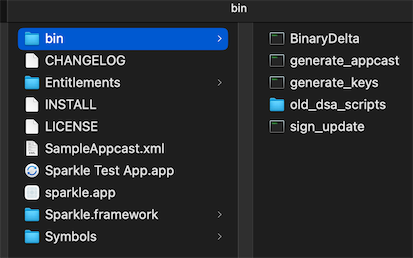
証明書や、appcast.xmlの作成に、プロジェクトに導入したSparkleを利用するのは面倒なので、Releases · sparkle-project/Sparkle · GitHubより、Latest releaseの2.4.2も別途ダウンロードし解凍しておきます。
証明書の作成
ターミナル.appを起動したら、「cd 」(cdの後に半角スペースあり)と入力した後に、ダウンロードした「Sparkle-2.4.2」フォルダをドラッグ&ドロップするとパスが補完されます。問題なければリターンキーを押します。ダウンロードした「Sparkle-2.4.2」フォルダに移動しました。
「./bin/generate_keys」と入力したら、リターンキーを押します。「OK! A new key has been generated and saved in the Keychain.」と表示されれば OKです。

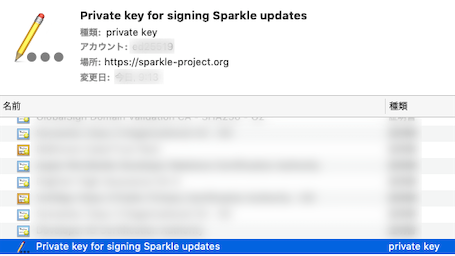
キーチェーン.appを開くと、プライベートキーが以下のように保存されています。
もう一度、「./bin/generate_keys」と入力したら、リターンキーを押します。「OK! Read the existing has saved in the Keychain.」と表示され、 SUPublicEDKey to:の後にパブリックキーが表示されます。必ずどこかに保管しておいてください。
(なお、万が一忘れてしまっても、一度作成済みでキーチェーンに登録してあれば、「./bin/generate_keys」と入力して、リターンキーで、公開鍵が表示されます。<key>SUPublicEDKey</key> <string>ここに公開鍵が表示されます</string>)

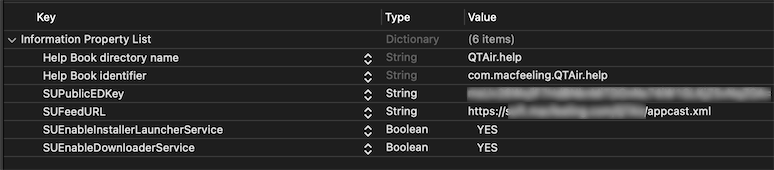
Xcodeのプロジェクトのinfo.plistに「SUPublicEDKey」という項目を追加して、先ほど表示されたパブリックキーをコピーしてください。

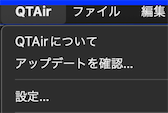
「アップデートを確認」メニューの作成
Setting up Sparkle programmatically – Sparkle: open source software update framework for macOS
@mainがあるswiftファイルに以下を追加します。
import SwiftUI
import Foundation
import Sparkle

// This view model class publishes when new updates can be checked by the user
final class CheckForUpdatesViewModel: ObservableObject {
    @Published var canCheckForUpdates = false

    init(updater: SPUUpdater) {
        updater.publisher(for: \.canCheckForUpdates)
            .assign(to: &$canCheckForUpdates)
    }
}

// This is the view for the Check for Updates menu item
// Note this intermediate view is necessary for the disabled state on the menu item to work properly before Monterey.
// See https://stackoverflow.com/questions/68553092/menu-not-updating-swiftui-bug for more info
struct CheckForUpdatesView: View {
    @ObservedObject private var checkForUpdatesViewModel: CheckForUpdatesViewModel
    private let updater: SPUUpdater

    init(updater: SPUUpdater) {
        self.updater = updater

        // Create our view model for our CheckForUpdatesView
        self.checkForUpdatesViewModel = CheckForUpdatesViewModel(updater: updater)
    }

    var body: some View {
        Button("アップデートを確認…", action: updater.checkForUpdates)
            .disabled(!checkForUpdatesViewModel.canCheckForUpdates)
    }
}

@main
struct QTAirApp: App {

    private let updaterController: SPUStandardUpdaterController

    init() {
        // If you want to start the updater manually, pass false to startingUpdater and call .startUpdater() later
        // This is where you can also pass an updater delegate if you need one
        updaterController = SPUStandardUpdaterController(startingUpdater: true, updaterDelegate: nil, userDriverDelegate: nil)
    }

    var body: some Scene {
        WindowGroup {
            ContentView()
        }
        .commands {
            CommandGroup(after: .appInfo) {
                CheckForUpdatesView(updater: updaterController.updater)
            }
        }

    }
}
こんな感じになります。
設定画面の作成
Adding a Settings UI – Sparkle: open source software update framework for macOS
設定画面は例では「SettingsView.swift」ファイルを作成して行います。
以下のような感じで「自動でアプリのアップデートを確認する」を作成します。

「SettingsView.swift」ファイルに以下のように記載します。
なお、「自動でアプリのアップデートを確認する」以外は省略しています。
import SwiftUI
import Sparkle

struct SettingsView: View {
    @Environment(\.dismiss) var dismiss

    private let updater: SPUUpdater

    @State private var automaticallyChecksForUpdates: Bool = false
    //@State private var automaticallyDownloadsUpdates: Bool = false

    init(updater: SPUUpdater) {
        self.updater = updater
        //ここが公式のページとは違います
        _automaticallyChecksForUpdates = State(initialValue: updater.automaticallyChecksForUpdates)
        //automaticallyDownloadsUpdates = State(initialValue: updater.automaticallyDownloadsUpdates)
    }

    var body: some View {
        VStack {
            //中略
            Toggle("自動でアプリのアップデートを確認する", isOn: $automaticallyChecksForUpdates)
                .onChange(of: automaticallyChecksForUpdates) { newValue in
                    automaticallyChecksForUpdates = newValue
                }
                .frame(width: 370, alignment: .leading)

            //閉じるボタン
            Button(action: {
                //閉じる
                dismiss()
            }){
                Text("閉じる")
                    .font(.title3)

            }
            .frame(width: 380, height: 20, alignment: .trailing)
            .padding(20)
        }
    }
}先ほどの、@mainがあるswiftファイルに以下を追加します。
//設定画面
Settings {
    SettingsView(updater: updaterController.updater)
}
こんな感じになります。
@main
struct QTAirApp: App {

    private let updaterController: SPUStandardUpdaterController

    init() {
        // If you want to start the updater manually, pass false to startingUpdater and call .startUpdater() later
        // This is where you can also pass an updater delegate if you need one
        updaterController = SPUStandardUpdaterController(startingUpdater: true, updaterDelegate: nil, userDriverDelegate: nil)
    }

    var body: some Scene {
        WindowGroup {
            ContentView()
        }
        .commands {
            CommandGroup(after: .appInfo) {
                CheckForUpdatesView(updater: updaterController.updater)
            }
        }
        //設定画面
        Settings {
            SettingsView(updater: updaterController.updater)
        }
    }
}
Info.plistへの追加
Keyは「SUEnableInstallerLauncherService」TypeはBoolean、ValueはYES
Keyは「SUEnableDownloaderService」TypeはBoolean、ValueはYES

Sandboxへの対応
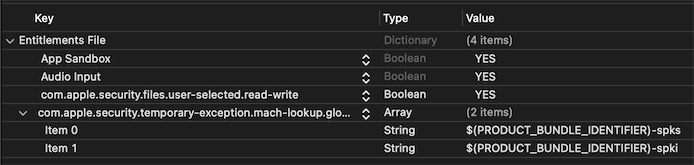
プロジェクトの「アプリ名.entitlements」に以下を追加
Keyが「com.apple.security.temporary-exception.mach-lookup.global-name」TypeがArray
keyがitem0、TypeがString、Valueが「$(PRODUCT_BUNDLE_IDENTIFIER)-spks」
keyがitem1、TypeがString、Valueが「$(PRODUCT_BUNDLE_IDENTIFIER)-spki」
appcastの作成
いつも通りにアプリをビルドします。私の場合はこんな感じ「Product」»「Archive」»「Distribute App」»「Developer ID」»「Export」
出来上がったアプリは Zipで圧縮(ドキュメントにFor Sparkle, tarballs and ZIPs are fastest and most reliable. DMG are slowest.と書かれているので DMGはやめたほうが無難なようです。)
Publishing an update – Sparkle: open source software update framework for macOS
ditto -c -k –sequesterRsrc –keepParent <src_path_to_app> <zip_dest>
例えば作成されたアプリが「QTAir.app」だとすると
ditto -c -k –sequesterRsrc –keepParent QTAir.app QTAir.zip
ターミナル.appを起動したら、「cd 」(cdの後に半角スペースあり)と入力した後に、ダウンロードした「Sparkle-2.4.2」フォルダをドラッグ&ドロップするとパスが補完されます。問題なければリターンキーを押します。ダウンロードした「Sparkle-2.4.2」フォルダに移動しました。
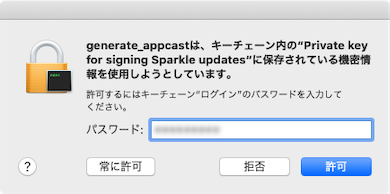
「./bin/generate_appcast」と入力したら、半角スペースの後に Zipに圧縮したアプリが入っているフォルダをドラッグ&ドロップするとパスが補完されます。問題なければリターンキーを押します。(キーチェーンから管理者パスワードを要求されたら入力してリターンキー。)
「appcast.xml」というファイルが生成されます。これをお使いのサーバーにアップロードします。

念の為、appcast.xmlファイルをお使いのエディタで開いて、sparkle:version=”0,0,0″ sparkle:shortVersionString=”0,0,0″ がビルドしたアプリのバージョンになっているかを確認してください。
もしも、設定したバージョンになっていない場合は、~/Library/Caches/Sparkle_generate_appcast/に「アプリ名 .zip」フォルダがあるかを確認してください。もしある場合は削除してから、もう一度generate_appcastを実行してください。
アップロードの場所を Info.plistに記載します。 Xcodeのプロジェクトの Info.plistに「SUFeedURL」という項目を追加し、 URLを記入します。
あと、アップデートはInfo.plistのCFBundleVersionと比較するので、フォーマットには注意してください。CFBundleVersion – Information Property List | Apple Developer Documentation

appcast.xmlにリリースノートを追加する
Publishing an update – Sparkle: open source software update framework for macOS
<item>タグの中に以下を記述
<description><![CDATA[
ここに表示するリリースノートを記載
]]>
</description>
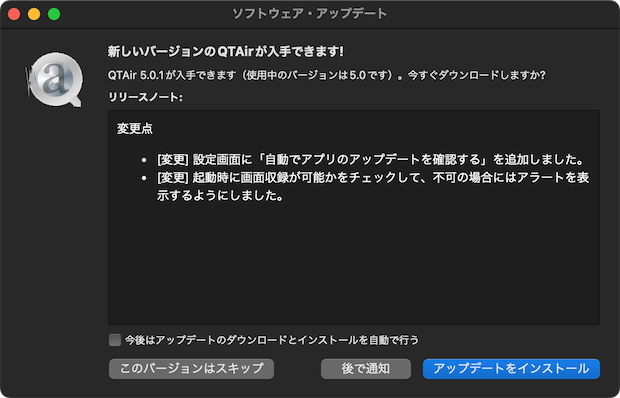
</item>実行結果
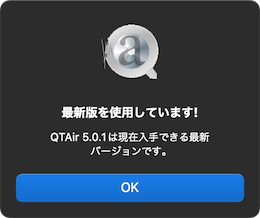
以上。参考になれば幸いです。

コメント